INDICATIONS
- Treatment of pneumothorax or pleural effusion
EQUIPMENT
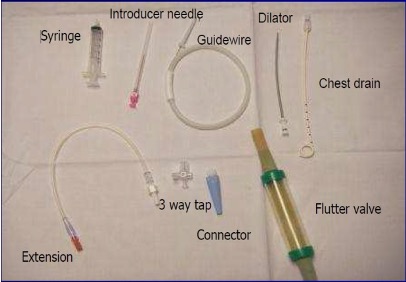
- Introducer needle
- Chest drain
- Guidewire
- Dilator
- 3-way tap, connector
- Extension
- Flutter valve
- Steri-Strip™
- Transparent dressing
PROCEDURE
-
It is advisable 2 people are scrubbed for this procedure
Step 1: Analgesia
- Ensure baby has adequate analgesia
- if ventilated: use morphine bolus
- if non-ventilated: use low-dose fentanyl (watch for chest wall rigidity)
- lidocaine locally
Step 2: Aseptic technique
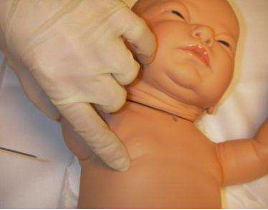
- Use sterile gloves and gown
- Identify site
- Clean skin according to local policy
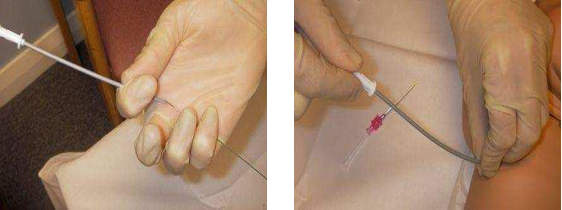
Step 3: Insert needle
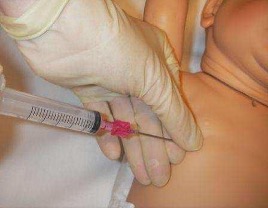
- Select location for chest drain - usually 5th intercostal space, anterior axillary line
- Place Steri-Strip™ 1 cm from bevelled end of needle
- ensures needle not advanced too far
- acts as marker in case of needle slipping out
- Insert needle whilst aspirating syringe
- Stop advancing once air aspirated (<1 cm)
Step 4: Insert wire
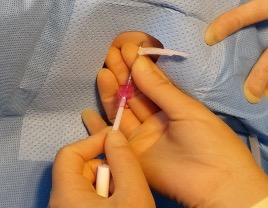
- Pass wire through needle ensuring wire is not inserted any further than silver mark. Holding wire still, remove needle
Take care to keep equipment sterile at all times. This may require an assistant to ‘control’ wire
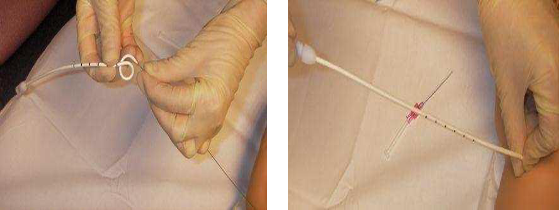
Step 5: Dilate the skin
-
Pass dilator along wire
-
Push dilator through skin approximately 1 cm, angling anteriorly
-
Skin may require small incision
-
Following dilation, dilator can be removed
At all times wire must be held still, not advanced or withdrawn
Step 6: Insert drain
- Advance drain over wire (this often needs an assistant)
- Advance drain through skin so holes are inside baby’s pleural space – i.e. at least 1 cm from the skin and insert to:
- preterm babies: 1st–2nd black mark
- term babies: 3rd–4th black mark
- Wire can now be removed
Step 7: Add flutter valve or connect to underwater seal
-
Assemble drainage equipment
-
extension
-
3-way tap
-
connector and flutter valve or underwater seal and suction
-
if connected to underwater seal use 5-8 cm H2O pressure suction
-
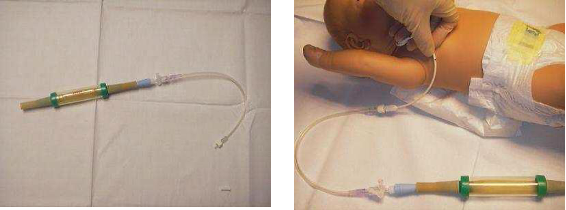
- Attach valve/underwater drain with suction to end of drain
- Chest X-ray to confirm position and monitor progress/resolution in pneumothorax or pleural effusion
Step 8: Secure drain
- Carefully secure drain
- do not use a purse string suture
- secure chest drain with Steri-Strip™ and Tegaderm™
- if required, suture may be placed through skin and knotted to drain
HOW TO REMOVE
- Wear personal protective equipment, i.e. gloves, eye protection
- Remove sutures and Tegaderm™
- Gently pull drain – pigtail will uncurl
- Beware of splashing body fluids – as drain comes out of skin, pigtail catheter will spring back
Date updated: 2024-01-16